参考:Tensorflow教程-猫狗大战数据集
贴一张自己画的思维导图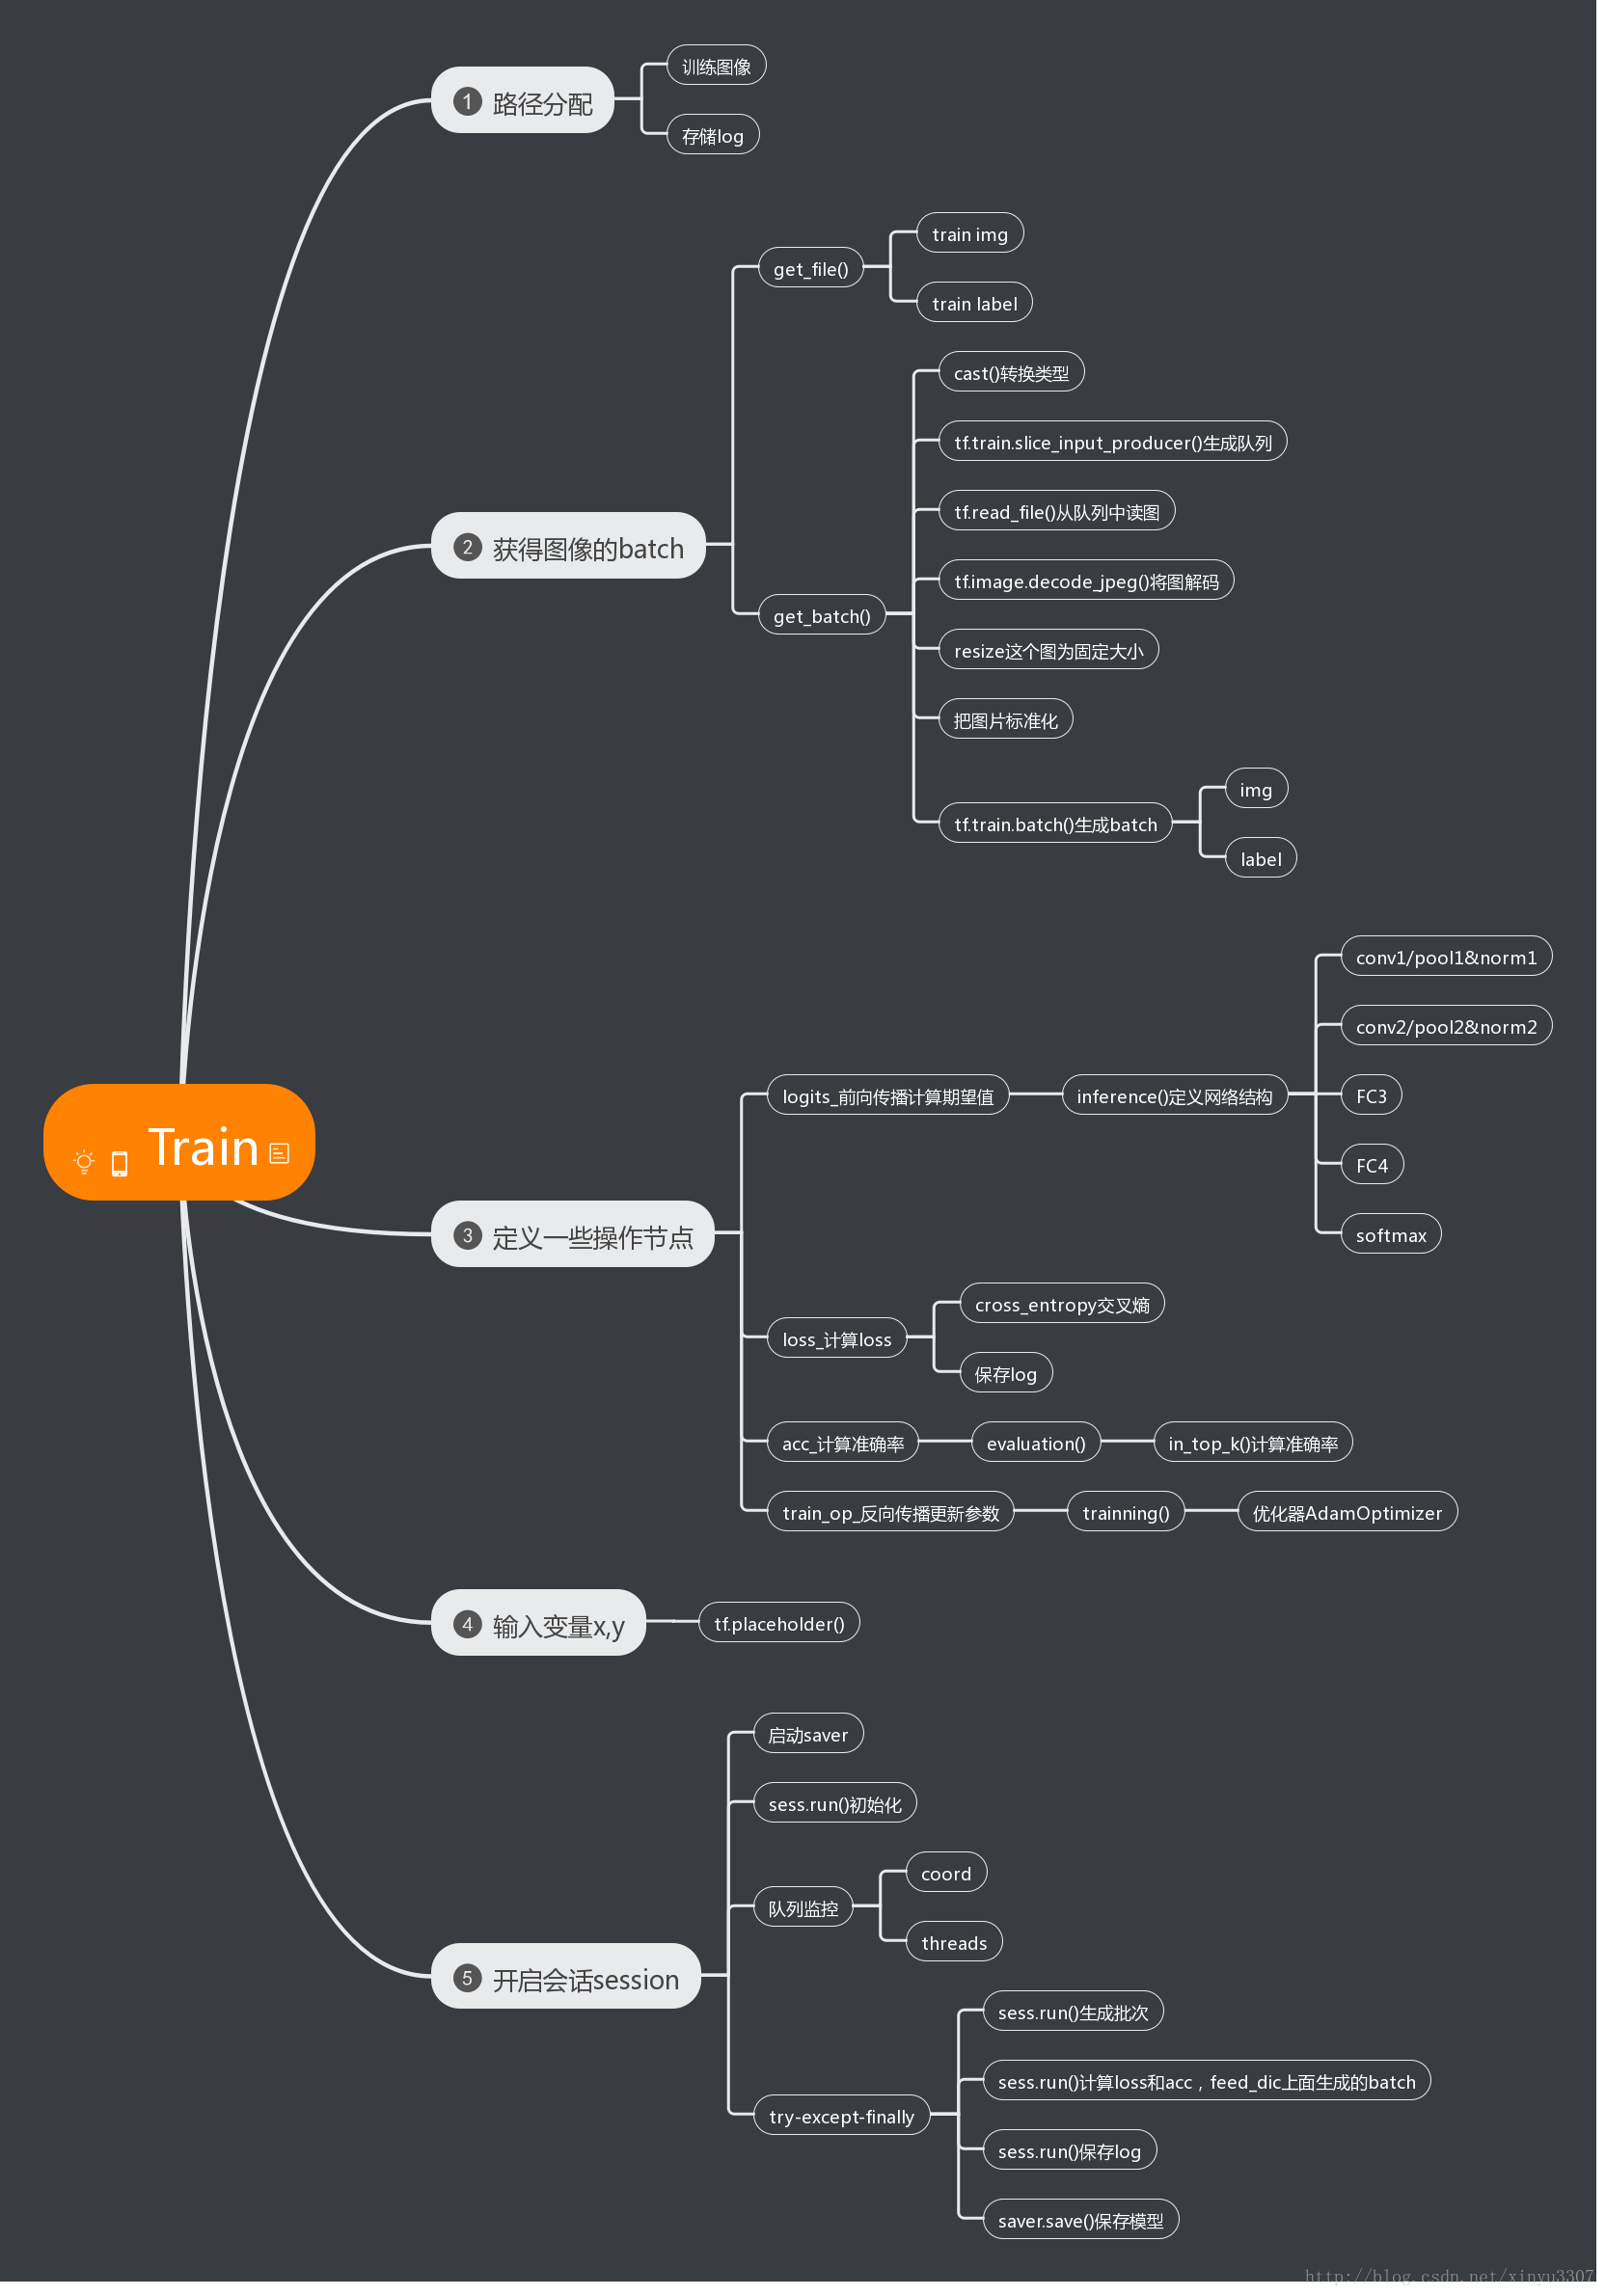
数据集准备
kaggle猫狗大战数据集(训练),微软的不需要翻墙
12500张cat
12500张dog
生成图片路径和标签的List
step1:获取D:/Study/Python/Projects/Cats_vs_Dogs/data/Cat下所有的猫图路径名,存放到cats中,同时贴上标签0,存放到label_cats中。狗图同理。
train_dir = 'D:/Study/Python/Projects/Cats_vs_Dogs/data'
def get_files(file_dir):
for file in os.listdir(file_dir+'/Cat'):
cats.append(file_dir +'/Cat'+'/'+ file)
label_cats.append(0)
for file in os.listdir(file_dir+'/Dog'):
dogs.append(file_dir +'/Dog'+'/'+file)
label_dogs.append(1)
step2:对生成的图片路径和标签List做打乱处理
#把cat和dog合起来组成一个list(img和lab)
image_list = np.hstack((cats, dogs))
label_list = np.hstack((label_cats, label_dogs))
#利用shuffle打乱顺序
temp = np.array([image_list, label_list])
temp = temp.transpose()
np.random.shuffle(temp)
#从打乱的temp中再取出list(img和lab)
image_list = list(temp[:, 0])
label_list = list(temp[:, 1])
label_list = [int(i) for i in label_list]
生成Batch
step1:将上面生成的List传入get_batch() ,转换类型,产生一个输入队列queue,因为img和lab是分开的,所以使用tf.train.slice_input_producer(),然后用tf.read_file()从队列中读取图像
image_W, image_H, :设置好固定的图像高度和宽度
设置batch_size:每个batch要放多少张图片
capacity:一个队列最大多少
def get_batch(image, label, image_W, image_H, batch_size, capacity):
#转换类型
image = tf.cast(image, tf.string)
label = tf.cast(label, tf.int32)
# make an input queue
input_queue = tf.train.slice_input_producer([image, label])
label = input_queue[1]
image_contents = tf.read_file(input_queue[0]) #read img from a queue
step2:将图像解码,不同类型的图像不能混在一起,要么只用jpeg,要么只用png等。
image = tf.image.decode_jpeg(image_contents, channels=3)
1
step3:数据预处理,对图像进行旋转、缩放、裁剪、归一化等操作,让计算出的模型更健壮。
image = tf.image.resize_image_with_crop_or_pad(image, image_W, image_H)
image = tf.image.per_image_standardization(image)
step4:生成batch
image_batch: 4D tensor [batch_size, width, height, 3],dtype=tf.float32
label_batch: 1D tensor [batch_size], dtype=tf.int32
image_batch, label_batch = tf.train.batch([image, label],
batch_size= batch_size,
num_threads= 32,
capacity = capacity)
#重新排列label,行数为[batch_size]
label_batch = tf.reshape(label_batch, [batch_size])
image_batch = tf.cast(image_batch, tf.float32)
测试
step1:变量初始化,每批2张图,尺寸208x208,设置好自己的图像路径
BATCH_SIZE = 2CAPACITY = 256IMG_W = 208IMG_H = 208
train_dir = 'D:/Study/Python/Projects/Cats_vs_Dogs/data'
step2:调用前面的两个函数,生成batch
image_list, label_list = get_files(train_dir)
image_batch, label_batch = get_batch(image_list, label_list, IMG_W, IMG_H, BATCH_SIZE, CAPACITY)
step3:开启会话session,利用tf.train.Coordinator()和tf.train.start_queue_runners(coord=coord)来监控队列(这里有个问题:官网的start_queue_runners()是有两个参数的,sess和coord,但是在这里加上sess的话会报错)。利用try——except——finally结构来执行队列操作(官网推荐的方法),避免程序卡死什么的。i<2执行两次队列操作,每一次取出2张图放进batch里面,然后imshow出来看看效果。
with tf.Session() as sess:
i = 0
coord = tf.train.Coordinator()
threads = tf.train.start_queue_runners(coord=coord)
try:
while not coord.should_stop() and i<2:
img, label = sess.run([image_batch, label_batch])
# just test one batch
for j in np.arange(BATCH_SIZE):
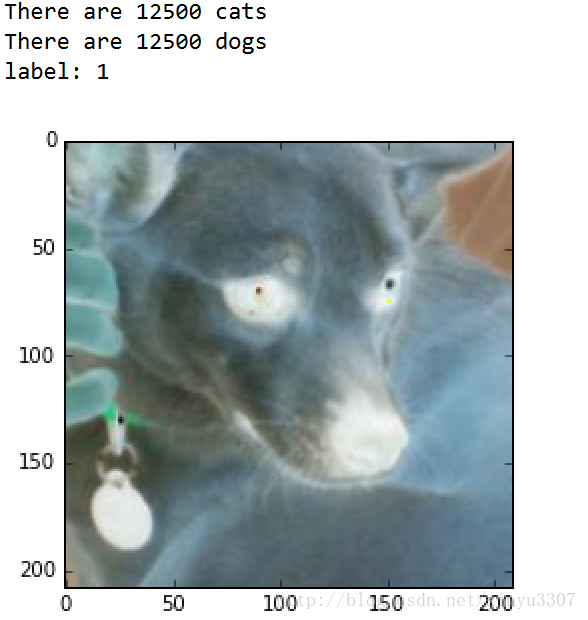
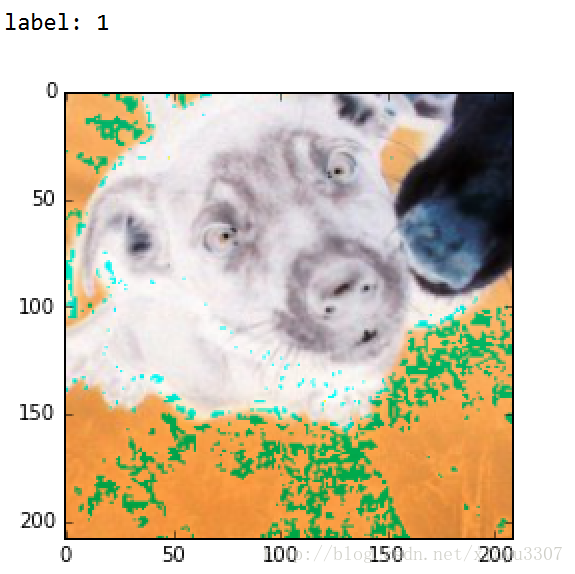
print('label: %d' %label[j])
plt.imshow(img[j,:,:,:])
plt.show()
i+=1
except tf.errors.OutOfRangeError:
print('done!')
finally:
coord.request_stop()
coord.join(threads)
step4:查看结果,会出现4张图,resize的效果感觉不是很好,不知道是什么问题2017.7.10 图片不正常是因为生成batch的时候将image转成了浮点型,吧image_batch = tf.cast(image_batch, tf.float32)注释掉后就好了
作者:xinyu3307

 微信扫一扫,打赏作者吧~